
Powershell Basics: Monitoring Applications - Part I
This article also assumes that you have at least a basic understanding of PowerShell and are have some experience with working with objects, variables, functions and parameters. If not, don’t worry, there is some great content on YouTube surrounding introductions to PowerShell. Shane Young in particular has a great introductory video series that you can find HERE.
As the title suggests, this will be a multi-part series. In Part I of this series I will start by covering the basics of creating a PowerShell script and setting it to run on a schedule. The next parts of the series will cover adding automated email notifications through an SMTP Relay or through a service like Microsoft Office 365.
Future Planned Parts (I will update with links later): Part II - PowerShell Basics: Add Email Notifications To Our Monitor Part III - PowerShell Basics: Adding Self Remediation Steps to the Script Part IV - PowerShell Basics: Refactor Our Script for Better Scaling
Getting Started
With any script I create, the first thing I like to do is create some form of plain text based output. This is so that if something doesn’t appear to be working correctly, we have a log file we can look back at and see if our script just wasn’t running, if an error occurred, where the script may have stopped processing, etc.
Start by creating a folder on the server where we can store our script and the log files that it will output. You can place these in two separate directories, or in the same folder together as I will be doing here for simplicity.
”C:\Scripts\Monitoring” is the base folder I will be using for this example and I have already created this folder on my server. Once I have this base folder path, I will create a variable to store this path at the very top of my script, as we will be referring to this directory more than once in our script. While here, let’s also create a variable for the name of the script we will be monitoring. In my case, I will be using “SteamMonitor” as the script title as I am going to be using Valve’s Steam client for this tutorial. Steam makes a good example because it has both Windows Services and Windows Executables/Processes that need to be running for it work correctly.
$scriptFolderPath = "C:\Scripts\Monitoring"
$scriptTitle = "SteamMonitor"
Next, I want to create the logging function. I have a very simple logging function that I use in a lot of my scripts.
function writeLog
{
	Param
    (
    	[Parameter(Mandatory=$true, ValueFromPipelineByPropertyName=$true)]
        [ValidateNotNullOrEmpty()]
        [string]$logMessage

        [Parameter(Mandatory=$false)]
        [ValidateSet("ERROR", "INFO")]
        [string]$state="INFO"
    )

    $logTime = Get-Date -Format "MM-dd-yyyy HH:mm"
    $currentDate = Get-Date -Format "MM-dd-yyyy"

    switch ($state) {
    	'ERROR' {
        	$logState = "ERROR:"
		}
        'INFO' {
        	$logState = "INFO:"
		}
    }

    "$logTime $logState $logMessage" |
	Out-File -FilePath "$scriptFolderPath\$scriptTitle_$currentDate.log" -Append
}
The function above allows us to easily write a new log file each day, and all we need to do is write “writeLog -state “INFO” -logMessage “Whatever message we want to log”. Later on we will implement a cleanup script to remove log files older than X days so that we don’t end up with thousands of files in the folder eating space.
Let’s initiate the log by writing the following line after the function closing bracket.
writeLog -state "INFO" -logMessage "==== $scriptTitle has started ===="
This will give us a reference point we can review in the log to know when the script started and we don’t just have one giant chain of log entries.
Checking A Windows Service
Checking that an application is running in PowerShell is a actually a really straight forward task thanks to a built in cmdlet called “Get-Service”.
This can be used as follows: Get-Service "Steam Client Service"
You can run that command in a standard PowerShell window to see the expected output:

As we will be referencing the service name and the returned response from our cmdlet later, we will create two new variables and that should look similar to this.
$steamService = "Steam Client Service"
$steamServiceCheck = Get-Service $steamService
Now that we have this stored in a variable at the time the script was run, we can check the “Status” property of the service and log the appropriate data using our function from earlier.
writeLog -state "INFO" -logMessage "Checking $steamService"

if($steamServiceCheck.Status -eq "Running"){
	$steamServiceMessage = "$steamService is running as expected."
	writeLog -state "INFO" -logMessage $steamServiceMessage
}else{
	$steamServiceMessage = "$steamService is not running!"
	writeLog -state "ERROR" -logMessage $steamServiceMessage
}
Let’s put this all together and see what we should have up until this point:
$scriptFolderPath = "C:\Scripts\Monitoring"
$scriptTitle = "SteamMonitor"

function writeLog
{
    [CmdletBinding()]
	Param
    (
    	[Parameter(Mandatory=$true, ValueFromPipelineByPropertyName=$true)]
        [ValidateNotNullOrEmpty()]
        [string]$logMessage,

        [Parameter(Mandatory=$false)]
        [ValidateSet("ERROR", "INFO")]
        [string]$state="INFO"
    )

    $logTime = Get-Date -Format "MM-dd-yyyy HH:mm"
    $currentDate = Get-Date -Format "MM-dd-yyyy"

    switch ($state) {
    	'ERROR' {
        	$logState = "ERROR:"
		}
        'INFO' {
        	$logState = "INFO:"
		}
    }

    "$logTime $logState $logMessage" |
	Out-File -FilePath "$scriptFolderPath\$scriptTitle_$currentDate.log" -Append
}

writeLog -state "INFO" -logMessage "==== $scriptTitle has started ===="

$steamService = "Steam Client Service"
$steamServiceCheck = Get-Service $steamService

writeLog -state "INFO" -logMessage "Checking $steamService"

if($steamServiceCheck.Status -eq "Running"){
	$steamServiceMessage = "$steamService is running as expected."
	writeLog -state "INFO" -logMessage $steamServiceMessage
}else{
	$steamServiceMessage = "$steamService is not running!"
	writeLog -state "ERROR" -logMessage $steamServiceMessage
}
Once you have something similar to the code I posted above, we should be in a good place to do our first test of the script. Testing the script is as easy as pressing the “Run Script” button in the toolbar of PowerShell ISE or hitting the F5 key on your keyboard. In VS Code, if you have properly installed the Powershell extension, you should be able to use the F5 key there as well or again using the “Run” buttons in the top right hand side.
If the script run successfully, you should not see any errors outputting in the terminals of the program you are using.
Browse to the “C:\Scripts\Monitoring” folder we created earlier and you should have a log file listed.

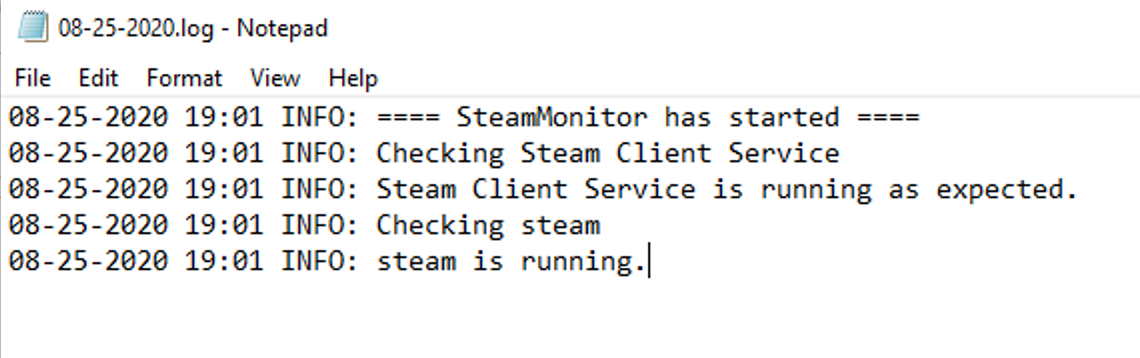
If you open the log file, there will be something similar to below:
08-25-2020 18:41 INFO: ==== SteamMonitor has started ==== 08-25-2020 18:41 INFO: Checking Steam Client Service. 08-25-2020 18:41 INFO: Steam Client Service is running as expected
Congrats! We have a basic monitoring script that works. Using this simple monitor, depending on the frequency we run it using the scheduled task we will create later (every minute, five minutes, hourly, etc), we can get an estimate of when an application stopped running.
Checking that an Application is Running
Checking a running application is still relatively easy, thanks again to another built-in cmdlet “Get-Process”. However, there are a few more steps I want to include in checking the process. This is because while the application can be “running” that doesn’t necessarily mean it is responding, so we will add a few lines to check that and make use of the select utility to select the responding property from the Process Object that is returned.
$steamApplication = "steam"
$steamApplicationCheck = Get-Process $steamApplication -ErrorAction SilentlyContinue |
Select Name, Description, Responding

writeLog -state "INFO" -logMessage "Checking $steamApplication"

if(!$steamApplicationCheck){

	$steamApplicationMessage = "$steamApplication is not running!"
	writeLog -state "ERROR" -logMessage $steamApplicationMessage

}else{

    if($steamApplicationCheck.Responding -eq "True"){
    	$steamApplicationMessage = "$steamApplication is running."
	    writeLog -state "INFO" -logMessage $steamApplicationMessage
    }else{
        $steamApplicationMessage = "$steamApplication is not responding!"
	    writeLog -state "ERROR" -logMessage $steamApplicationMessage
    }

}
You can see in the code above we are doing the two checks mentioned.
- Is the process or executable running?
- Is the process or executable actually in a responsive state?
Based on the writeLog messages I placed, you can get a general idea of what each code sections is checking.
Here is the full code one last time:
$scriptFolderPath = "C:\Scripts\Monitoring"
$scriptTitle = "SteamMonitor"

function writeLog
{
    [CmdletBinding()]
	Param
    (
    	[Parameter(Mandatory=$true, ValueFromPipelineByPropertyName=$true)]
        [ValidateNotNullOrEmpty()]
        [string]$logMessage,

        [Parameter(Mandatory=$false)]
        [ValidateSet("ERROR", "INFO")]
        [string]$state="INFO"
    )

    $logTime = Get-Date -Format "MM-dd-yyyy HH:mm"
    $currentDate = Get-Date -Format "MM-dd-yyyy"

    switch ($state) {
    	'ERROR' {
        	$logState = "ERROR:"
		}
        'INFO' {
        	$logState = "INFO:"
		}
    }

    "$logTime $logState $logMessage" |
	Out-File -FilePath "$scriptFolderPath\$scriptTitle_$currentDate.log" -Append
}

writeLog -state "INFO" -logMessage "==== $scriptTitle has started ===="

$steamService = "Steam Client Service"
$steamServiceCheck = Get-Service $steamService

writeLog -state "INFO" -logMessage "Checking $steamService"

if($steamServiceCheck.Status -eq "Running"){
	$steamServiceMessage = "$steamService is running as expected."
	writeLog -state "INFO" -logMessage $steamServiceMessage
}else{
	$steamServiceMessage = "$steamService is not running!"
	writeLog -state "ERROR" -logMessage $steamServiceMessage
}

$steamApplication = "steam"
$steamApplicationCheck = Get-Process $steamApplication -ErrorAction SilentlyContinue |
Select Name, Description, Responding

writeLog -state "INFO" -logMessage "Checking $steamApplication"

if(!$steamApplicationCheck){

	$steamApplicationMessage = "$steamApplication is not running!"
	writeLog -state "ERROR" -logMessage $steamApplicationMessage

}else{

    if($steamApplicationCheck.Responding -eq "True"){
    	$steamApplicationMessage = "$steamApplication is running."
	    writeLog -state "INFO" -logMessage $steamApplicationMessage
    }else{
        $steamApplicationMessage = "$steamApplication is not responding!"
	    writeLog -state "ERROR" -logMessage $steamApplicationMessage
    }

}
Let’s run this one last time and check our log output!
Setting a Scheduled Task to Run Our Script
To make things even easier on us, Windows has the “Task Scheduler” built in to run programs for us on certain triggers or timers. For this example, I will set a scheduled task to run our script every 5 minutes.
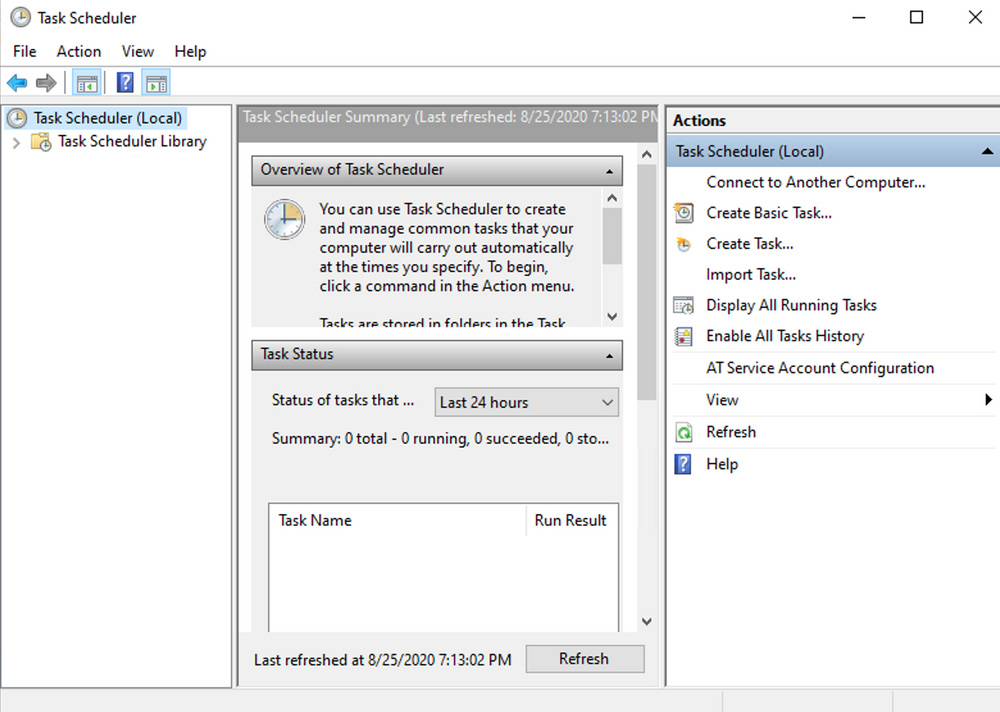
Click the start menu on the server or desktop you are creating this script on, and browse to administrative tools and click on Task Scheduler. You should see a screen similar to the below:
My preference is to right click on “Task Scheduler Library” and create a new folder called “Monitoring” or “Scripts.” This way we can easily locate our custom tasks later on.
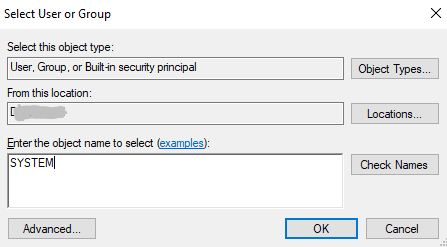
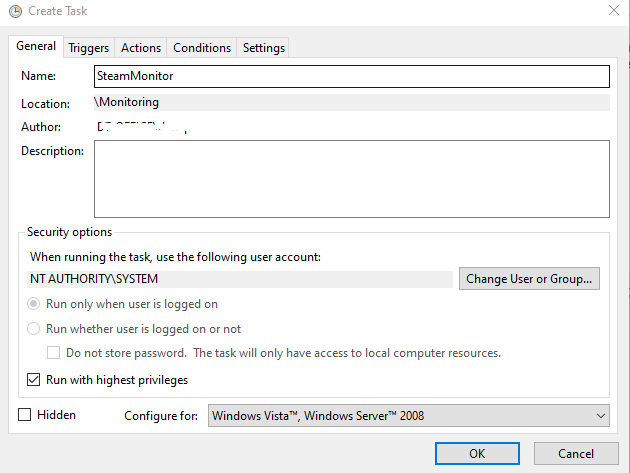
Click on the new folder you created and the list on the right should show empty. Right click in the empty area and click “Create New Task..” Give the task a name that will help you identify which script it is executing. Click the “Change User or Group” and set the script to run as the “SYSTEM” account.
Click the Triggers tab and then add a new trigger. Below is how I have mine configured:
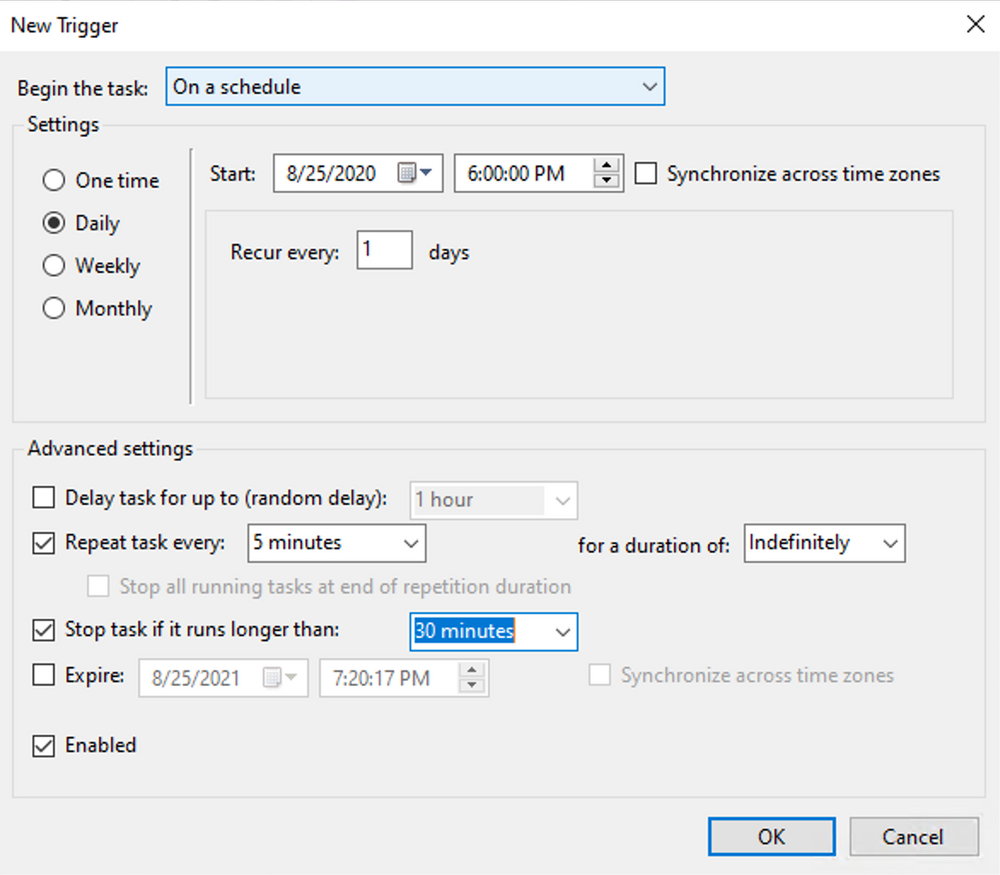
The “Stop task if it runs longer than:” option is particularly important as we don’t want our script to hang and remain stuck in the background.
Finally, click the “Actions” tab and add a new action. Leave the dropdown option set for “Start a Program”. In the Program/Script field, type in “powershell.exe”
In the “Add Arguments” Field, enter the replacing the script path with your own:
-ExecutionPolicy Bypass C:\Scripts\Monitoring\SteamMonitor.ps1
Check your log file after enough time has passed and validate that new logs have been written on the schedule!
There we have it! A very basic monitor and logging system without any third party software. However, as we know, logging is not going to be enough on its own. In the next part we will work on setting up the email notifications to alert you when a failure is detected.
If you run into issues or have any suggestions or questions surrounding this post, feel free to join the Discord and we can discuss further there!